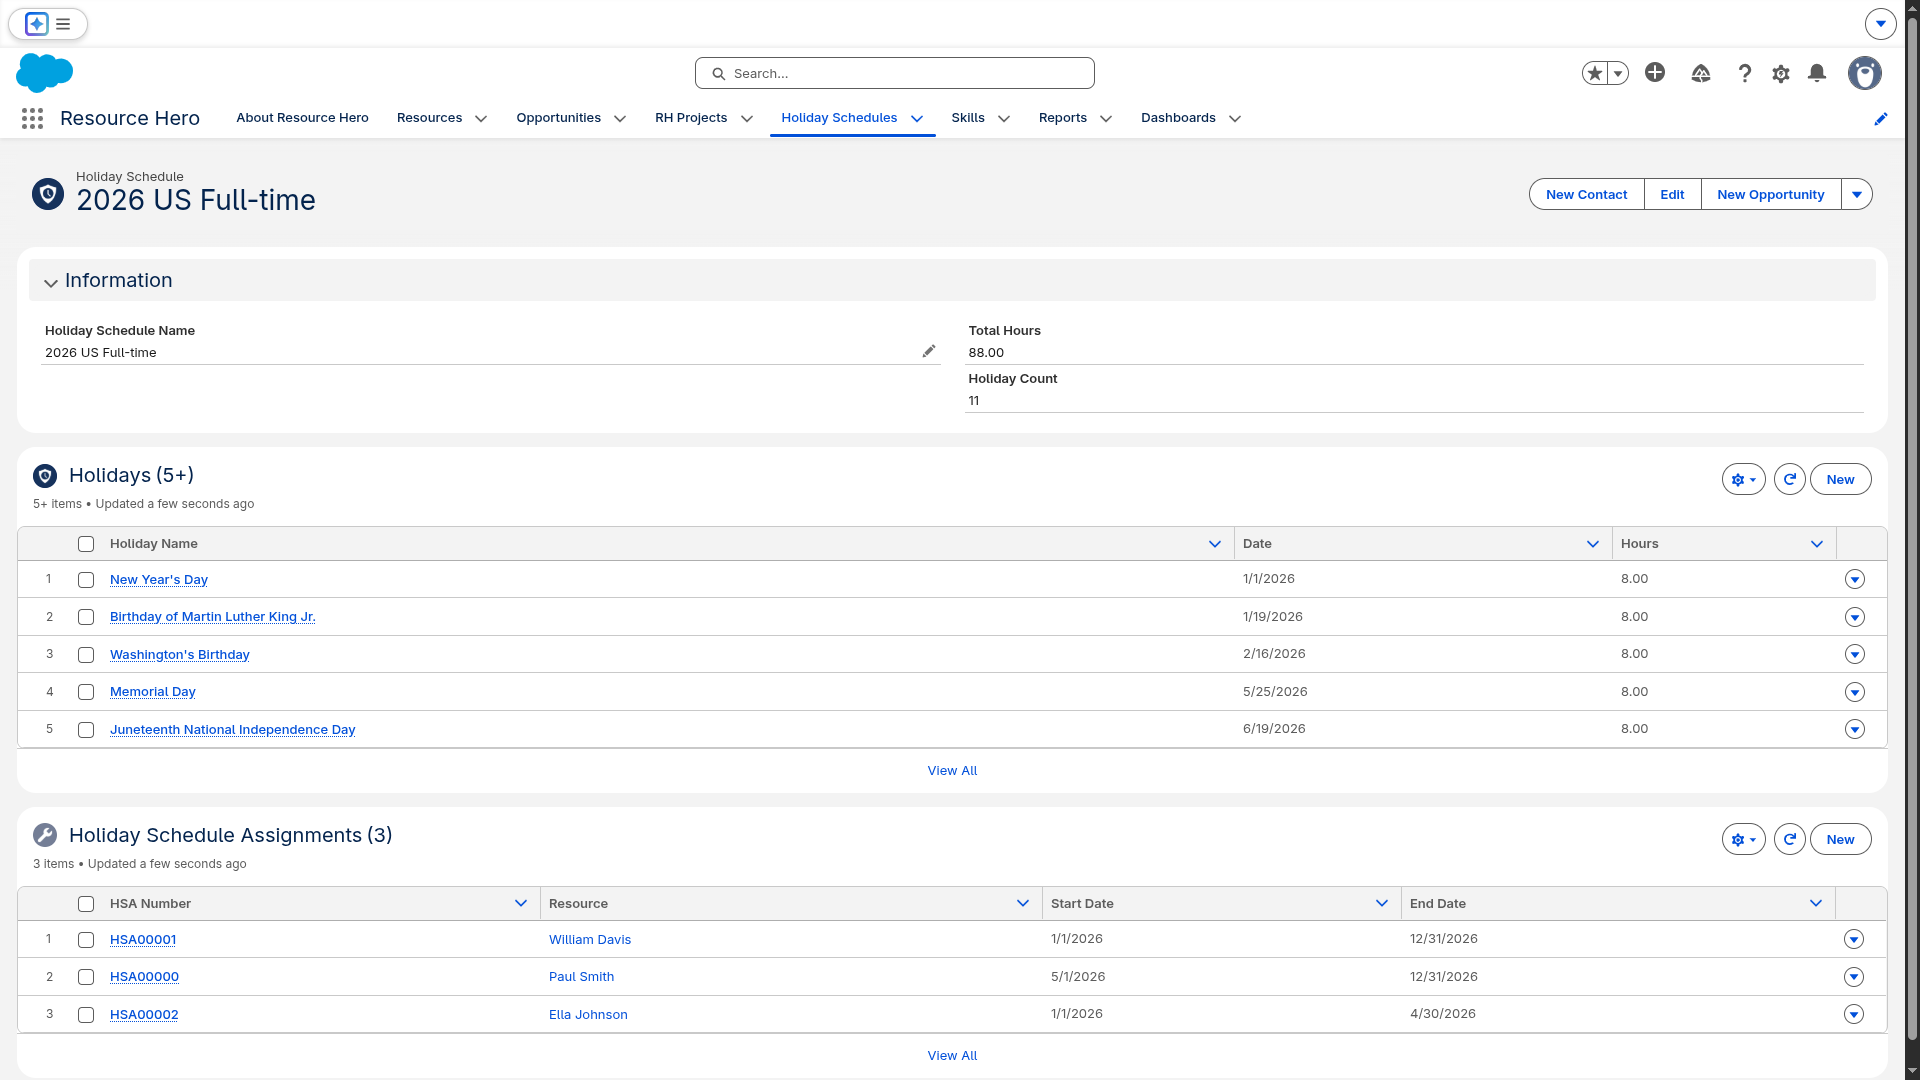
Enhanced Holiday Schedules allow you to define company-wide holidays and easily assign them to your Resources. Create multiple holiday schedules for different employee groups, such as full-time vs. part-time or by region, and assign one or more schedules to each resource using Holiday Schedule Assignments.
With specific start and end dates on each assignment, you have precise control over when holidays apply. Holidays are automatically reflected on resource timesheets and availability, with no manual entry required.
Create and assign Holiday Schedules to your Resources
Before creating and assigning holiday schedules, ensure you have the appropriate access: your user must be assigned the Resource Hero – Holiday Administrator permission set, OR you must have the equivalent permissions through custom profile/permission set configuration
You can create assignments from either the Resource record or the Holiday Schedule record:
From a Resource Record:
Open the Resource record
Scroll to the Holiday Schedules tab
Click New on the Holiday Schedule Assignments related list
The Resource field will be pre-populated
Select the Holiday Schedule to assign
Set the Start Date and End Date for when this assignment is effective
Click Save
From a Holiday Schedule Record:
Open the Holiday Schedule record
Scroll to the Holiday Schedule Assignments related list
Click New
The Holiday Schedule field will be pre-populated
Select the Resource to receive this schedule
Set the Start Date and End Date for when this assignment is effective
Click Save
Note: you can load Holiday Schedule Assignments in bulk using Salesforce’s Data Import Wizard. For detailed instructions and information about bulk loading holidays, see Bulk Loading Holidays and Holiday Schedule Assignments.
Date Ranges
The date range on each holiday schedule assignment controls which holidays are applied:
Only holidays with dates falling between Start Date and End Date (inclusive) create forecasts
Changing the date range automatically reconciles forecasts – adding new ones or removing ones that no longer apply
Leaving End Date blank means the assignment applies indefinitely
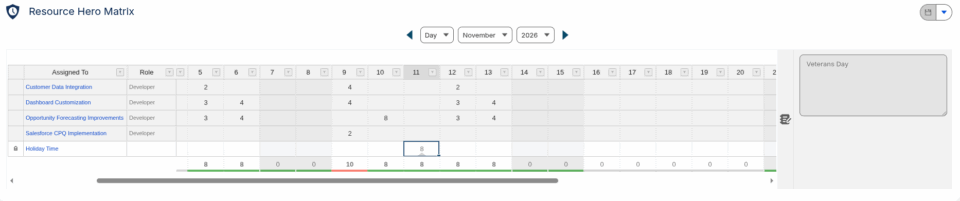
How Holidays Appear on Timesheets
On creation, the system automatically creates Resource Forecast records for each holiday within the date range. These forecasts appear on the resource’s timesheet in the RH Matrix under the Holiday Time assignment. Holiday time reduces the resource’s available capacity for that day and no manual entry is required.
Note: Holiday dates are calendar dates and are not adjusted for timezone differences. For example, a holiday set for December 25 will appear on December 25 for all resources regardless of their location.