You can leverage the power of the Resource Hero matrix on any custom numeric field created on the Resource Forecast object. This will allow you to create create a matrix on fields other than Forecast and Actual. Examples might include:
- A budget matrix that tracks dollars over time
- An FTE (full-time equivalent) matrix that forecasts by percentage
- A component matrix that tracks the number of widgets you will install
If the following example, we will create a matrix to help us track the original budget of a project.
Create required fields
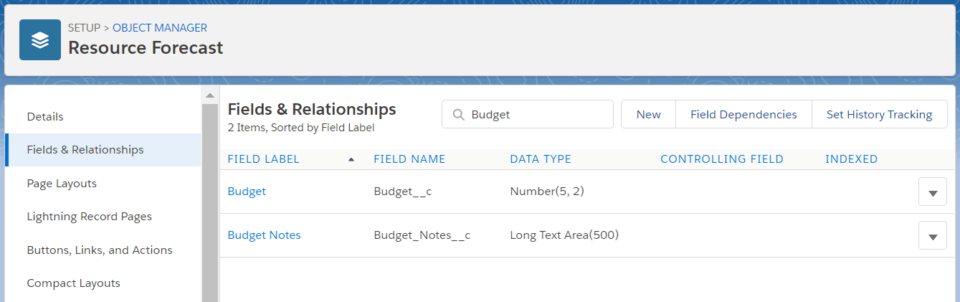
Create the numeric field on the Resource Forecast object
- Field should be of type Number
- Field length is 5 with two decimal places
- Default value: 0
Create the notes field on the Resource Forecast object
- Field should be of type Text Area (Long)
- Length is 500
Create a custom setting entry
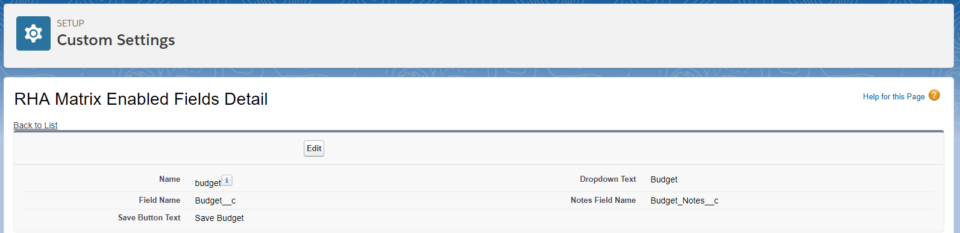
- From Setup, enter Custom Setting in the Quick Find search box
- Click Manage next to the RHA Matrix Enabled Fields custom setting
- Click the New button
- Enter the following details:
- Name: a short name that will be used to reference these settings
- Field Name: this is the API name of the numeric field that you created in the previous step
- Save Button Text: this is the text that will display on the Save button in the matrix
- Dropdown Text: this is the text that will display in the Resource Hero Dashboard under the Field drop down
- Notes Field Name: this is the API name of the text area field that you created above
Add the RH Matrix to your layout
Now that the field is configured, you can leverage it within the RH Matrix interface. For details on how to add the RH Matrix to your layouts, view The Matrix Lightning Web Component support page. The field created above will be selected in the Matrix Enabled Field configuration option.
